3 Easy Ways to Remove the Background from a Logo
Have you ever come across the dilemma of finding the absolute perfect picture for your brand only to realize that a completely irrelevant background accompanies it? Or perhaps you’re trying to remove the background from your logo to use it in a marketing campaign, but you’re lost on how to get started?
Moments like these really do leave you scratching your head, don’t they?
Well, you’re in for luck. With Desygner, separating elements of a picture from the background is as simple as ABC!
Methods to Remove Logo Background
1. Removing the Background Using the Standard Background Remover tool.
With the automatic background remover from Desygner, you’ll have logos with transparent backgrounds ready to use in your designs within a jiffy!
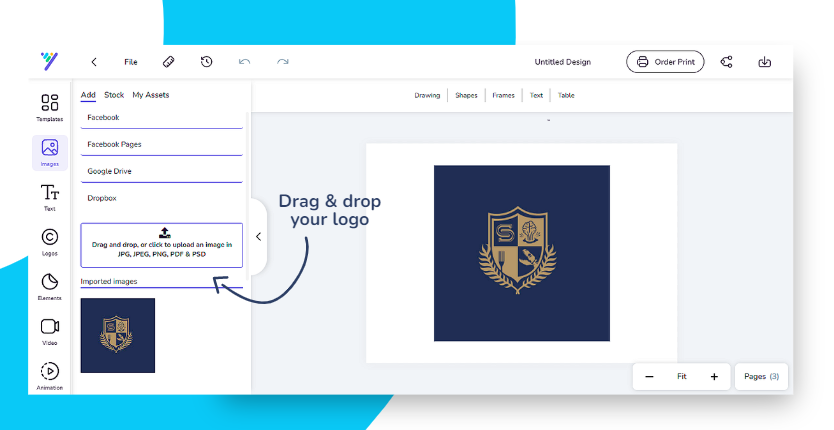
Import or Search a Logo
- With Desygner, you can either import a logo or search through its built-in library of stock images.
- Simply press “Upload Image” to import a logo into the editor. Currently, the accepted image and other files are JPG, JPEG, PNG, PDF, and PSD.

It is important to note that some images perform better with the background remover tool compared to others. Factors include:
- Contrast: High contrast between the foreground and the background is always easier to separate, therefore consistently looking better.
- BackgroundType: Single-color backgrounds are easier to remove than multicolored, highly-detailed backgrounds.
- Blurred Background: If the foreground is sharp, it can be removed easily and efficiently.
Remove the Logo’s Background
Simply add your image to the canvas and select it. You can then carry out the procedure of removing the background from your logo by clicking the “Remove Background” button.

Change Background Color (Optional)
- Select the image’s background.
- Change the color using the top toolbar.
- Add shapes, designs, or whatever you want! Be as creative as you wish!
Having removed the background from the image, you can now add new pictures. The sky’s the limit, and you can now create unique collages for your brand campaigns!

Related Article: How To Effortlessly Remove Background From PDF
2. Remove the Background Using the Background Remover Advanced Tool: Graphics Mode
The advanced tool described above is built to extract logos having intricate designs and text. Read on to learn how to operate this software!
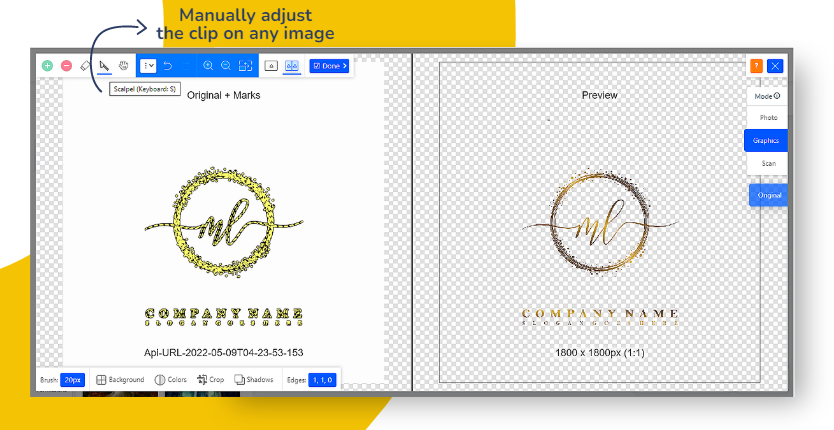
Desygner’s Background Remover tool also offers an advanced Graphics Mode, integrated with a specialized background removing tool for Graphics and Logos. Though it operates similarly to the standard Background Remover tool, it can recover finer logo details while simplifying the removal of flat background colors.
Upload Image
First and foremost, we begin by uploading an image. Immediately after uploading an image, Graphic Mode is responsible for making things interesting. What the tool does is it instantaneously analyzes your image and automatically produces a result. Wouldn’t you agree that it’s a walk in the park?
Inspect and Edit (Optional)
While the automatically generated result from the Graphics Mode is entirely usable, at times, a more professional human touch may be required to tune up the result to what you want it to be.
This is why we provide you with a unique Smart Editor, where you can inspect your result in great detail and make even the finest of changes.
Tweak (Optional)
Liven up things by adding some neat finishing touches here and there, like drop shadows, color adjustments, cropping, and changing the background color.
Scalpel and Feathering
You can use the Scalpel tool to great effect with Desygner’s Graphics Mode. It’s handy for logos that don’t have closed edges or where the background has an open path leading to the center of the logo. A single, quick scalpel cut, and you’re free of the foreground in the blink of an eye.
When it comes to feathering, Graphics Mode’s got your back. It automatically determines the feathering to use for the regular parts of the image. However, when it comes to scalpel cuts, you can rely on the “Feathering Radius” setting.

To wrap it all up, simply download your logo and use it in whatever brand campaign you’d like!
3. Remove the Background Using the Background Remover Advance Tool: Scan Mode
Trying to separate a logo on a white sheet of paper? Maybe it’s from a presentation, printed poster, or even a brochure.
Regardless of where it’s from, you’ll have to scan the sheet to remove the logo from the background. This is where Desygner’s advanced Background tool, Scan Mode, comes into play.
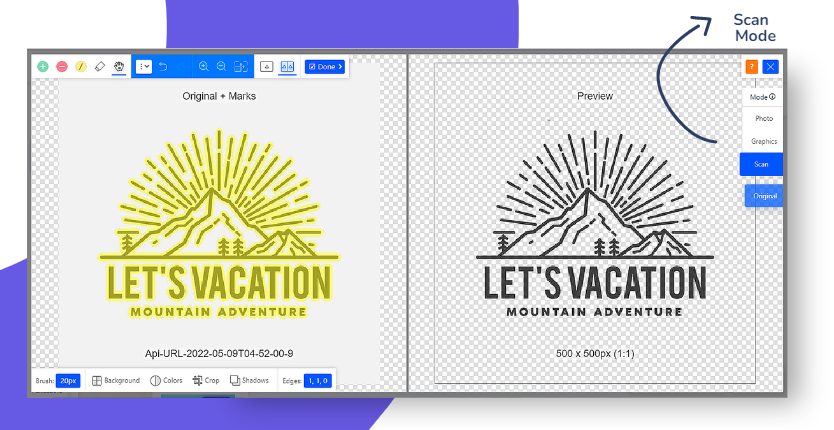
Scan Mode is yet another specialized Processing Mode for scans and photos of text. This mode can extract the extremely fine, gritty details that you’ll often find in scans or photos of signatures and official stamps.
Upload Image
As always, we begin by uploading an image, after which Scan Mode takes up the task of immediately analyzing your image and automatically producing a result.
Inspect & Edit (Optional)
Scan Mode operates a bit differently compared to other modes. It begins by analyzing the area highlighted, figuring out what portion of the image is the background and what’s the foreground. Anything that’s not marked defaults to the background.
While typically unnecessary, if the foreground appears too faded out or transparent, you can easily zoom far in and add highlight specific areas, bringing those spots up to full opacity.

Ending Notes
Get access to the most extensive graphic design platform with Desygner, a complete design bundle where you can create designs without any limitations.
Our standard Background removing utility is available in our Free, Pro+, and Business plans, whereas our standout advanced tools are available only in Enterprise plans.
To remain updated with the latest trends in graphic designs, follow Desygner on the latest social media platforms such as Facebook, Instagram, LinkedIn, and Youtube today!


